
How to Cup Coffee at Home: A Simple Tasting Method
Cupping is how coffee professionals compare beans side by side. Here is a simple home version, with the numbers, the steps and what to listen for in the cup.
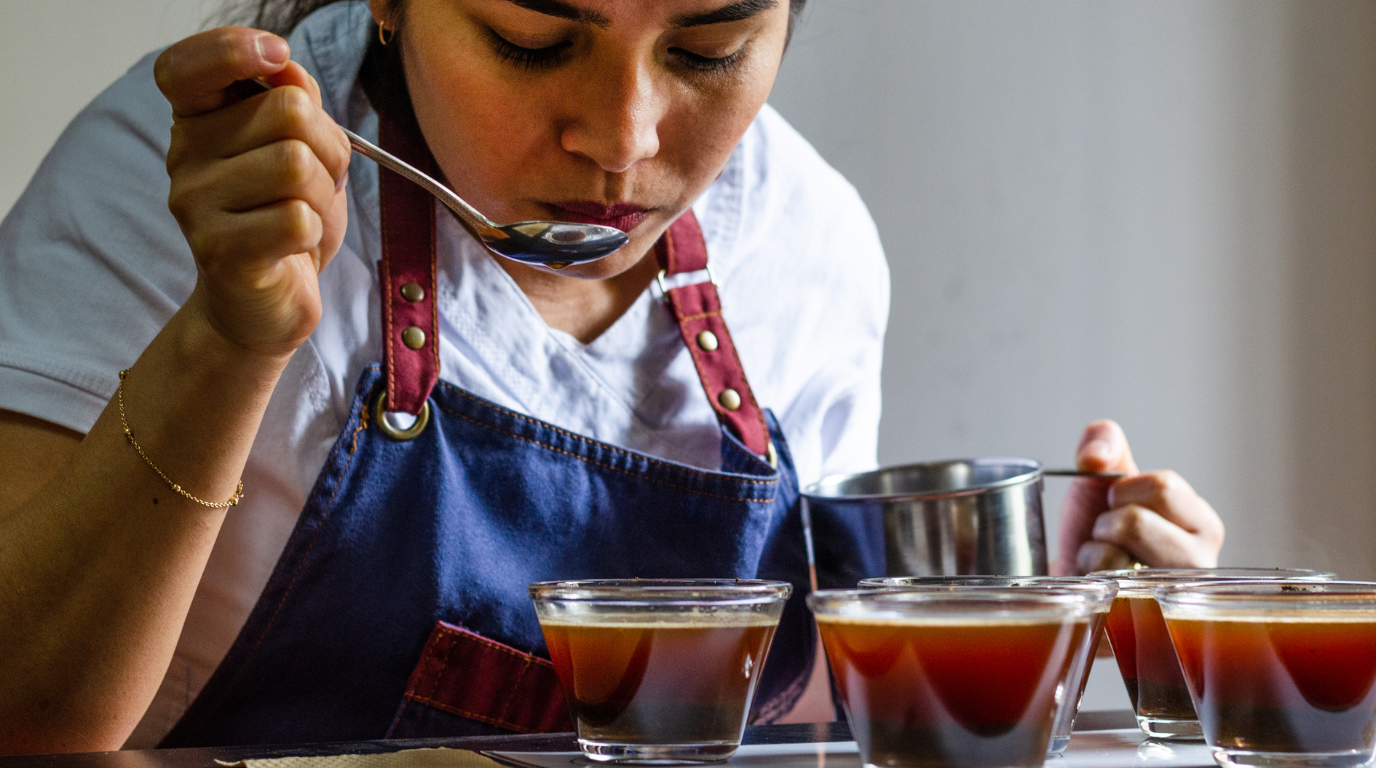
If you want to learn how to cup coffee at home, the good news is that you need almost nothing special: a scale, a kettle, a few identical cups and a soup spoon. Cupping is the method coffee buyers, roasters and graders use to taste many coffees side by side under the same conditions. Because every sample is brewed the same way, the differences you notice come from the beans, not from your technique. This guide explains the professional method, shows how to scale it down for a kitchen table, and suggests what to compare first.
What cupping is and why it works
Cupping is a simple immersion brew. Ground coffee goes into a cup, hot water is poured over it, and after a few minutes the floating layer of grounds is broken and skimmed away. The taster then sips the coffee from a spoon as it cools. There is no filter, no pressure and no recipe to tweak, which is exactly the point: when the brewing is held constant, one coffee can be compared fairly with another.
Professional cupping follows written protocols. The Specialty Coffee Association (SCA) publishes its Coffee Value Assessment standards, including a standard for sample preparation and tasting mechanics, and importers such as Royal Coffee publish detailed set-up guides based on the same practice. You do not need to follow every tolerance at home, but borrowing the main numbers makes your tasting far more consistent. Our guide to SCA specialty coffee grading explains how professional scores are built on top of this method.
What you need
- A scale that reads to 0.1 g. Small differences in dose change strength.
- Identical cups or glasses. Professionals use cups of about 207 to 266 ml (7 to 9 fl oz). Any matching heat-proof glasses or bowls will do.
- A grinder. A burr grinder gives an even grind; see our coffee grind size chart for the difference it makes.
- A kettle and thermometer, or a kettle you let rest briefly after boiling.
- Round soup spoons, one per taster, plus a glass of hot water to rinse them.
- Good water. Water is most of every cup; our guide to the best water for coffee explains what to look for.
- A notebook and, if you are tasting with friends, something to spit into.
The numbers professionals use
| Parameter | Professional practice | Easy home version |
|---|---|---|
| Ratio | 8.25 g of coffee per 150 ml of water | About 12 g in a 220 ml cup |
| Grind | Slightly coarser than paper-filter drip | Medium-coarse, like coarse sand |
| Water temperature | About 92 to 94 C (200 F) | Just off the boil, rested 30 seconds |
| Crust break | At about 4 minutes | Set a timer for 4 minutes |
| Tasting | From roughly 10 to 15 minutes after pouring, continuing as it cools | Taste at warm, then again at lukewarm |
| Cups per sample | 5 for formal SCA cupping | 2 or 3 are enough |
The 8.25 g to 150 ml ratio works out at roughly 1 to 18, a little weaker than many people brew at home. That is deliberate: a slightly lighter cup makes it easier to pick out acidity, sweetness and defects.
How to cup coffee: step by step
- Weigh the beans. Weigh whole beans for each cup separately, so every cup gets the same dose.
- Grind each cup just before brewing. Grind one cup at a time and tip the grounds straight in. If you grind several cups, cover them so aroma does not escape. Run a few beans of the next coffee through the grinder first to purge the previous one.
- Smell the dry fragrance. Lift each cup, tap it gently and smell. Write down what you notice: nutty, floral, chocolate, fruity.
- Pour the water. Pour hot water to the rim of each cup, making sure all the grounds are wet. Start the timer when the first cup is filled.
- Wait four minutes. A crust of grounds forms on the surface. Leave it undisturbed.
- Break the crust. At four minutes, push through the crust with the back of your spoon, stirring about three times, with your nose close to the cup. This is often the most aromatic moment of the session. Rinse the spoon between cups.
- Skim. Use two spoons to lift off the foam and floating grounds. Most of the remaining grounds sink.
- Let it cool and slurp. When the coffee is warm rather than hot, take a spoonful and slurp it loudly. The slurp sprays coffee across your palate and carries aroma to the back of the nose.
- Taste in rounds. Taste every cup, take notes, then go round again as the coffee cools. Flavours change with temperature, and defects often show more clearly at lower temperatures.
- Compare and decide. Rank the coffees, describe each in a few words and note which you would buy again.
What to pay attention to
Professional forms list many attributes, but four will take a home taster a long way. Aroma is what you smell when you break the crust. Acidity is the brightness on the sides of the tongue, which might remind you of apple, citrus or berry. Body is the weight or texture of the coffee in your mouth, from light and tea-like to round and syrupy. Finish is the flavour that lingers after you swallow. Our guide to coffee tasting notes gives a beginner vocabulary for each.
Also note consistency. If two cups of the same coffee taste noticeably different, one may contain a defective bean. Professionals cup several cups per sample for exactly this reason.
Good first comparisons
Cupping is most rewarding when the coffees differ in a single clear way. Some starting pairs:
- Two origins: a Jamaica Blue Mountain against an Ethiopian Yirgacheffe shows balance against floral brightness. Our Blue Mountain vs Ethiopian Yirgacheffe comparison tells you what to expect.
- Two processes: a washed and a natural coffee from the same country, explained in washed vs natural vs honey coffee.
- Two roasts: the same beans at a lighter and a darker roast, as described in coffee roast levels compared.
- Fresh against old: a freshly roasted bag against one that has been open for weeks, a vivid lesson in coffee storage.
Common mistakes
- Uneven doses. Weigh every cup; a scoop is not accurate enough.
- Tasting too hot. Very hot coffee hides flavour and can burn your mouth. Wait.
- Tasting in one order only. The first cup often tastes best simply because your palate is fresh. Change the order in the second round.
- Knowing which cup is which. If you can, ask someone to label the cups underneath so you taste blind.
- Strong smells nearby. Perfume, cooking smells and scented candles get in the way.
Turning cupping into better buying
A home cupping session is the quickest way to learn what you actually like. After a few sessions you will know whether you prefer bright, fruity coffees or round, balanced ones, and the words on a bag will start to mean something. Pair what you learn with our guide to reading a coffee label, and if you want to taste a classic balanced coffee as your reference point, try our Jamaica Blue Mountain whole beans alongside something from another origin.
Sources
Frequently Asked Questions
What is coffee cupping?
What ratio is used for cupping coffee?
Why do coffee tasters slurp?
How long do you wait before breaking the crust?
Do I need special equipment to cup coffee at home?
Was this helpful?
Ready to taste it?
Shop 100% authentic Jamaica Blue Mountain Coffee — whole bean, ground and pods.
Shop Coffee
0 Comments
Be the first to share your thoughts.
Leave a comment
Please sign in with your email to leave a comment.